Raymii.org

Quis custodiet ipsos custodes?Home | About | All pages | Cluster Status | RSS Feed
Qt 5.15 LTS on Windows without a Qt Account
Published: 19-05-2024 | Author: Remy van Elst | Text only version of this article
Table of Contents
I recently had to setup a Windows development environment with Qt 5.15. Qt 5.15 is still developed by the Qt company, but only released in binary form for paying customers. The source code is released after 1 year. Via the Online Installer you can only install 5.15.2 and you must login with a Qt account. This guide shows you how to install the most recent Qt 5.15 (as of writing it's 5.15.13) and Qt Creator, without a Qt account. We're using vcpkg to compile Qt and a specific offline-enabled installer for Qt Creator.
Recently I removed all Google Ads from this site due to their invasive tracking, as well as Google Analytics. Please, if you found this content useful, consider a small donation using any of the options below:
I'm developing an open source monitoring app called Leaf Node Monitoring, for windows, linux & android. Go check it out!
Consider sponsoring me on Github. It means the world to me if you show your appreciation and you'll help pay the server costs.
You can also sponsor me by getting a Digital Ocean VPS. With this referral link you'll get $200 credit for 60 days. Spend $25 after your credit expires and I'll get $25!
Usually I use a Linux environment where Qt is just an apt-get install or
pacman -Sy away. If I use Windows it's for Visual Studio to work on C#
projects or other DotNet stuff. A free version of Visual Studio(Community) is
available, no account required.
I have voiced my opinions on this license change many times before, no need to keep beating a dead horse. For my open source program I still use Qt 5.15 due to Windows 7 support and when starting that project, Qt 6 was incomplete. Feature parity with Qt 5.15 was only reached around Qt 6.6, late-2023, almost 4 years after the initial release of Qt 6. A lot of modules and features were removed with the release of Qt 6 and compatibility with older operating systems was dropped.
Commercial Qt is easy
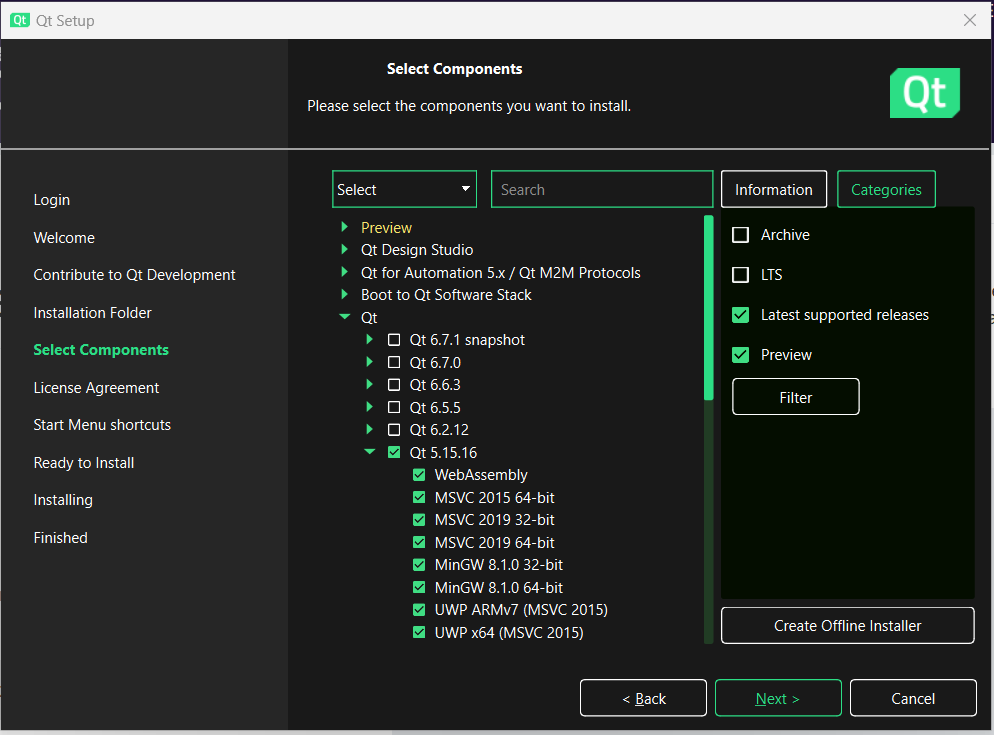
Qt on Windows is quite horrible if you're not paying. When you, or probably your company, is paying for a commercial license, the Qt Company provides binaries of Qt 5.15. Here's a screenshot of the online installer with my commercial Qt license. No need to filter on archive or LTS, 5.15.16 is in the list right away:
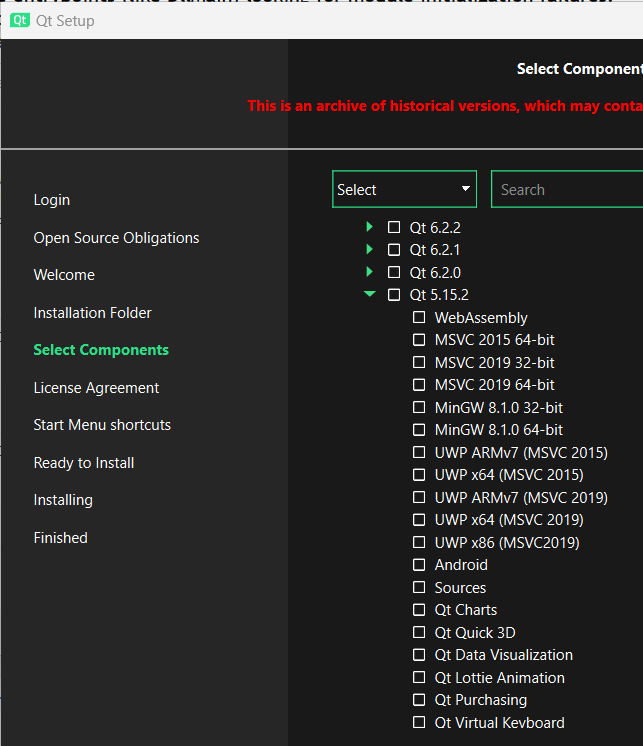
Here is the same installer with a free Qt account. You need to click Archive before Qt 5.15.2 is listed and there is a big red scary warning:
vcpkg is even easier
Due to the legal obligations Qt has
to release the source code for 5.15 within a year after the commercial
release. By using the vcpkg package manager, Qt 5.15.13 is just one command
away, and a bit of time. No manual compilation effort however, no need to
download Perl, Ruby or GCC. vcpkg uses Visual Studio and MSVC to compile Qt
and make it available. No need for an account and you get the latest security
fixes.
For Qt Creator there is no need to compile or use vcpkg.
Qt Creator 13 installation without a Qt Account
Qt publishes an installer of just Qt Creator on their download site.
Here is a magnet torrent link they provide. Download the installer for Windows and when the download is done, disconnect all networks. Set Windows into airplane mode and/or physically disconnect your network cable.
Download and start the installer, you'll be greeted by this screen:
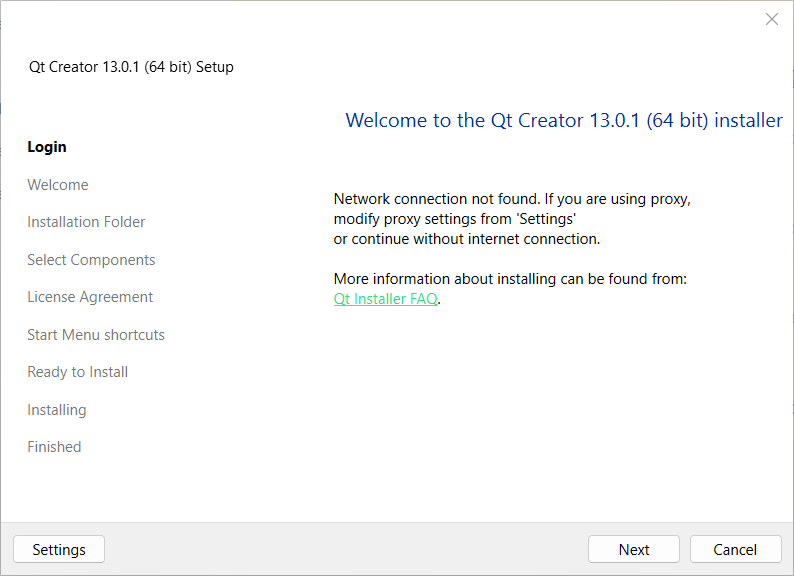
As you can see, no login possible, but there is a Next button. Continue with
the installation as normal.
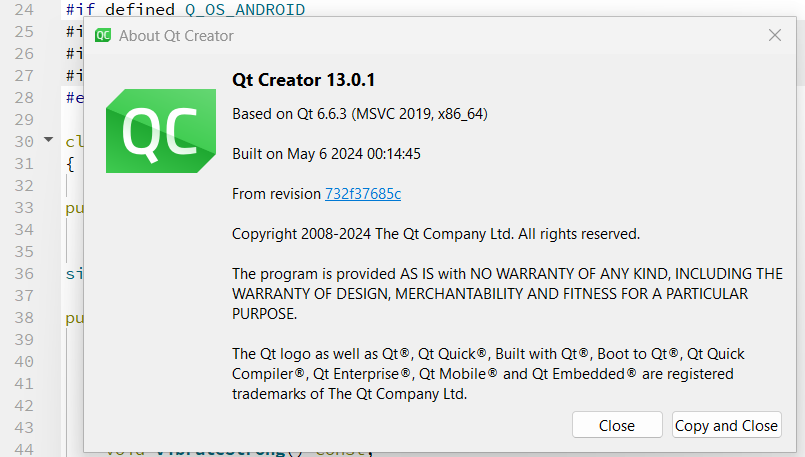
Here's a screenshot of this specific installed Qt Creator running:
Now on to the framework itself.
Installing Qt 5.15 with vcpkg
vcpkg
is an open-source C/C++ package manager maintained by Microsoft. It uses
ports, which are versioned build recipes to produce packages.
The most common use case is to use vcpkg in your own software repository
combined with CMake to manage libraries and dependencies. A new developer
only has to install vcpkg and then CMake can manage and/or install all
project dependencies without manual hassle. The CI/CD system also uses this,
saving time and effort.
However, we are using vcpkg to compile and easily install Qt 5.15. vcpkg
will handle all dependencies for us, resulting in a full Qt installation
usable with Qt Creator in just a few commands.
Make sure you have Visual Studio and MSVC installed!.
Use the installer for the community version or try this PowerShell command to install Visual Studio and install MSVC :
Invoke-WebRequest -Uri "https://aka.ms/vs/17/release/vs_community.exe" -OutFile
"vs_installer.exe";


Start-Process -Wait -FilePath ".\vs_installer.exe" -ArgumentList '--add
Microsoft.VisualStudio.Workload.NativeDesktop --includeRecommended --passive
--norestart'
Also make sure git for windows is installed.
Installing vcpkg
Start with setting up
vcpkg. I'm using the folder C:\bin as the root folder, if you use another
folder, change that for your setup in the rest of this article. For the
vcpkg setup I'm using a CMD window, but you can also use Powershell.
mkdir \bin
cd \bin\
Clone the vcpkg repository:
git clone https://github.com/microsoft/vcpkg.git
Go into the folder and execute the bootstrap script:
cd vcpkg
bootstrap-vcpkg.bat
For this CMD session, update your PATH:
set VCPKG_ROOT="C:\bin\vcpkg"
set PATH=%VCPKG_ROOT%;%PATH%
For later convenience, integrate vcpkg with Visual Studio:
vcpkg integrate install
That's all there is for the vcpkg setup. Continue with installing Qt. Do not
close this CMD window.
Installing Qt 5.15 via vcpkg
Execute the following command to install the first part of Qt 5.15:
vcpkg install qt5-base
This will resolve and install all required build dependencies for Qt 5. The command takes a while, on my system it was compiling for about an hour.
Execute the following command to install the rest of the Qt modules:
vcpkg install qt5
[3d,activeqt,charts,connectivity,core,datavis3d,declarative,doc,essentials,extras,gamepad,graphicaleffects,imageformats,location,mqtt,multimedia,networkauth,purchasing,quickcontrols,quickcontrols2,remoteobjects,script,scxml,sensors,serialbus,serialport,speech,svg,tools,translations,virtualkeyboard,webchannel,websockets,webview,xmlpatterns]
You can remove components you do not want, I've not included webengine
because that failed to compile. This takes another hour or so to compile.
I've split up the installation to make is easier to select different modules.
Your project might not need the Qt statemachine framework or Remote QObjects.
If I only provided qt5[all], installing would take a lot longer and you
might not need all modules.
When all compile commands are finished there is one more thing you must do.
Add the following to your %PATH% env variable (via sysdm.cpl for example)
and reboot:
C:\bin\vcpkgC:\bin\vcpkg\installed\x64-windows\debug\bin\C:\bin\vcpkg\installed\x64-windows\bin\
If you do not add the above to your PATH, the rest of the guide will not
work. Make sure to do it!
Set up the vcpkg Qt 5.15 kit in Qt Creator
Start Qt Creator and open your project. Click the Manage Kits button or open
the Preferences via the menu Edit -> Preferences. Qt Creator should have
detected MSVC and Visual Studio automatically:
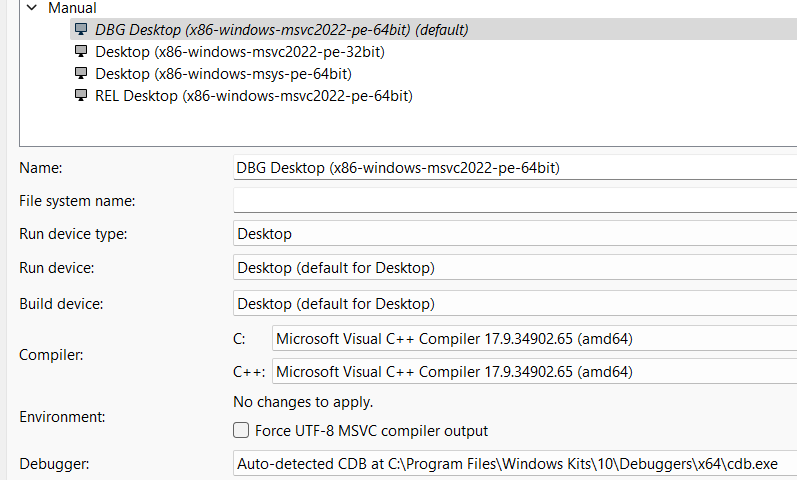
Copy the Desktop kit, rename one to include DBG and one to include REL.
You'll need one kit for Debug builds and one kit for Release builds. You'll
get missing DLL errors otherwise or if you try to compile a release build
with the debug kit, or the other way around. I've not looked into that more
since figuring the other parts out took longer than I wanted already.
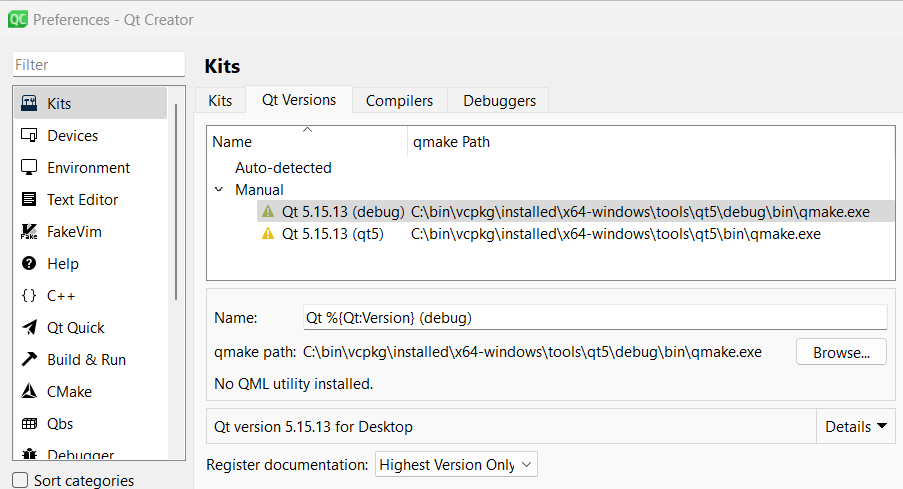
The only thing missing is the Qt version.
Open the Qt Versions tab and click Add.
Navigate to qmake.exe.
I have two versions, one for Debug builds and one for Release builds:
- Release:
C:\bin\vcpkg\installed\x64-windows\tools\qt5\bin\qmake.exe - Debug:
C:\bin\vcpkg\installed\x64-windows\tools\qt5\debug\bin\qmake.exe
After adding the Qt Versions navigate back to the Kits tab and select the
correct Qt version for the correct Kit. (Match Debug to the debug kit and
Release to the release kit).
You should now be able to compile your Qt project with this build of Qt.
Missing DLL errors
I tried to compile my own software and during compilation rcc.exe complained
about a missing DLL file. The screenshot is from LeafNodeMonitoring.exe
because I recreated the faulty scenario for a screenshot, however the initial
error came from rcc.exe:
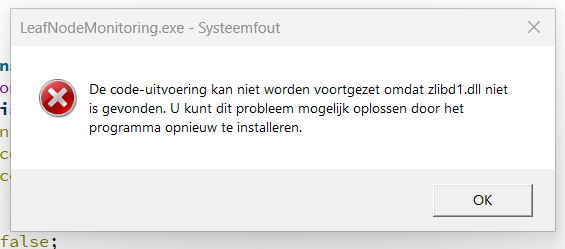
Notice the d1 part in the DLL filename? Not sure why, but this is why I have
defined two Qt versions and two kits, one for debug builds and one for
release builds. But this specific DLL kept failing in the debug builds, no
matter how my %PATH% was set up or ordered. Release build had no issues,
that worked the first time right away.
Dependency walker was of no use this time:
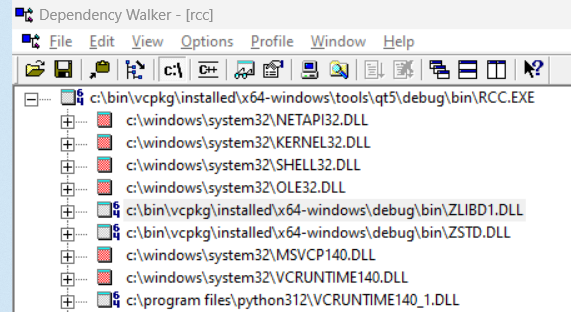
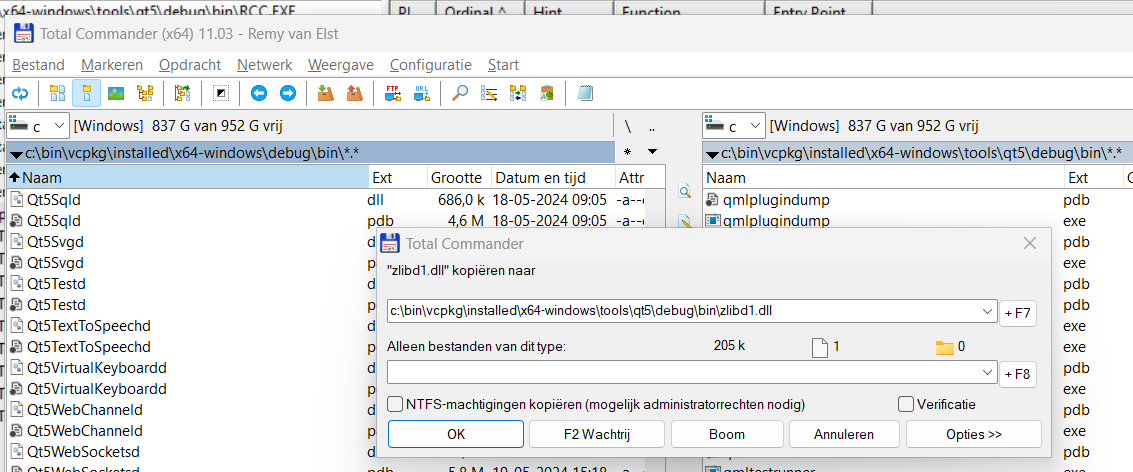
I ended up copying zlibd1.dll from the
C:\bin\vcpkg\installed\x64-windows\debug\bin\ folder to the folder where
rcc.exe was located
(C:\bin\vcpkg\installed\x64-windows\tools\qt5\debug\bin\).
Conclusion
Compared to manually compiling Qt 5.15, which required setting up and
littering your system with dependencies, using vcpkg is a breeze. It's
literally one command to install Qt, no account needed and it is
reproducible. My CI system now also builds Windows binaries because the
installation of Qt is automated without requiring an account.
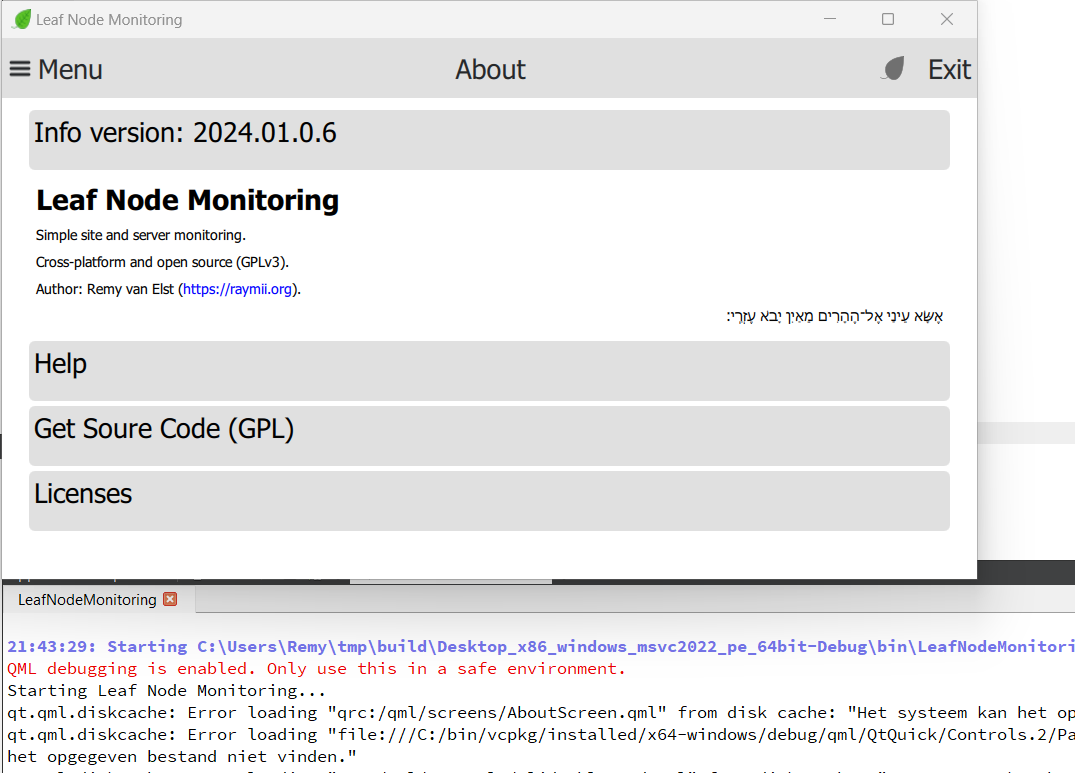
Here is a screenshot of my software after it was
compiled via this build of Qt. Look at the second qt.qml.diskcache log
line, it includes the vcpkg path so I know for sure it's using this
specific Qt version: