Raymii.org

אֶשָּׂא עֵינַי אֶל־הֶהָרִים מֵאַיִן יָבֹא עֶזְרִֽי׃Home | About | All pages | Cluster Status | RSS Feed
Build a $35 Time Capsule - Raspberry Pi Time Machine Backup Server
Published: 29-08-2014 | Author: Remy van Elst | Text only version of this article
❗ This post is over eleven years old. It may no longer be up to date. Opinions may have changed.
Table of Contents
This is a simple guide on building a $35 Time Capsule with a Raspberry Pi. A Time Capsule is a network attached storage device from Apple for use with their Time Machine. Time Machine gives users a very easy and userfriendly way to automatically create and restore (encrypted) backups. A Time Capsule is basically an expensive NAS that only talks the AFP/netatalk protocol. The 2 TB version costs $299 at this time, a Raspberry Pi only $35.
You will need the following:
- Raspberry Pi, Model B/B+
- USB Hard Disk / Big USB Dick
The Raspberry Pi can run either Raspbian or Arch, this guide works on both. The USB storage works best if it is externally powered.
I've tested with 2 different Raspberry Pi's, one model B+, raspbian, with a 128GB USB disk (from Sandisk) and on Raspberry Pi Model B with Arch and a 1 TB USB hard drive. I've got some spare disk lying around, if you don't you should buy one. The total cost might be higher than $35 if you need to buy storage or want a nice case and other accessories.
Preparing the disk
Make sure the Pi is installed with your OS of choice (Raspbian or Arch). Plug the USB drive in. We will first format it to a big EXT4 partition.
Install cfdisk first, or just use parted/fdisk if you know the drill.
Debian:
apt-get install cfdisk
Arch:
pacman -Sy cfdisk
Issue the dmesg command and look at the last few lines. Remove the USB storage
and re-attach it. Execute the dmesg command again and look for lines like
this:
[ 7793.698383] usb 1-2.4: USB disconnect, device number 11
[ 7798.233788] usb 1-2.4: new high-speed USB device number 12 using xhci_hcd
[ 7798.326648] usb-storage 1-2.4:1.0: USB Mass Storage device detected
[ 7799.331790] sd 3:0:0:0: [sdb] Attached SCSI removable disk
Here you can see that /dev/sdb is our newly attached disk. Change it to your
setup. Be carefull with this, any typo's might erase all your OS data. Format it
with cfdisk:
cfdisk /dev/sdb
Delete all partitions on there and create on big Linux (83) one. Do note that this will remove all data on the disk.
If you have a big disk (> 2 TB) you might need to create a GPT table on it. Use
parted for that:
parted /dev/sdb
mklabel gpt
unit s
mkpart primary 2048s 100%
name 1 BFS
quit
Now create an ext4 filesystem on it:
mkfs.ext4 /dev/sdb1
Proceed to mounting the disk.
Mounting the disk
We add the disk to /etc/fstab to make sure it will still be mounted after a
reboot. Otherwise you might end up with a full Pi and we don't want that.
Edit /etc/fstab:
vim /etc/fstab
Add the following to it, change the disk device path if it is different:
/dev/sdb1 /mnt/data ext4 noexec,defaults 0 0
Create the actual mount folder:
mkdir -p /mnt/data
Mount it, via fstab:
mount -a
Now check the df -h command and see if it is actually mounted.
Installing netatalk
netatalk is the program that talks the AFP protocol, which is wat Apple uses
for Time Machine. Install the daemon,
For Debian:
apt-get install netatalk
For Arch
pacman -Sy netatalk
Note that on Arch Linux Arm the AUR is included as a repo by default. If you run
it on regular arch you need to use yaourt to install netatalk or build
netatalk from the AUR yourself.
Make sure the service starts at boot:
Debian:
update-rc.d netatalk defaults
Arch:
systemctl enable netatalk
Configuring Netatalk
Edit the file /etc/afp.conf:
vim /etc/afp.conf
Place the following contents. Edit the path's, user names and IP range:
[Global]
 mimic model = TimeCapsule6,106
 log level = default:warn
 log file = /var/log/afpd.log
 hosts allow = 196.168.1.0/24

[Homes]
 basedir regex = /home

[TimeMachine]
 path = /mnt/data/timecapsule/
 valid users = tmuser wife remy
 time machine = yes

[Shared Media]
 path = /mnt/data/torrents/
 valid users = wife remy
Do not use a symlink as the source of this file. netatalk will not work correctly.
I also share a folder with my Transmission Torrents in there, that contains about 400 GB of Linux iso's. The OS X machine is the only machine with a DVD burner in the house, therefore I use that to burn them to disk.
The config file itself it pretty self explainatory.
Make sure the folders actually exist. Create them with:
mkdir -p /mnt/data/{timecapsule,torrents}
Restart the netatalk service:
Debian:
service netatalk restart
Arch:
systemctl restart netatalk
On Arch you might need to configure the Avahi service, on Arch Linux Arm it is enabled by default. This provides Bonjour capabilities.
You might need to create a user or set the correct permissions on the folder.
I'll add the user wife to the Pi, put her in the users group and give the
users group write permissions on the folders we share via AFP.
Add the user wife:
useradd wife
Set the password for wife:
passwd wife
Create the users group:
groupadd users
Add the user to the users group:
usermod -aG users wife
Set the correct permissions on the time machine folder:
chown remy:users /mnt/data/timecapsule
chmod 775 /mnt/data/timecapsule
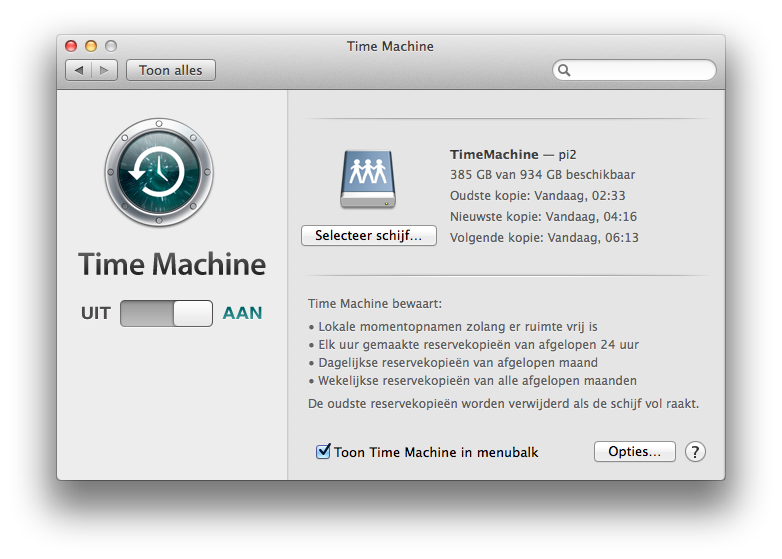
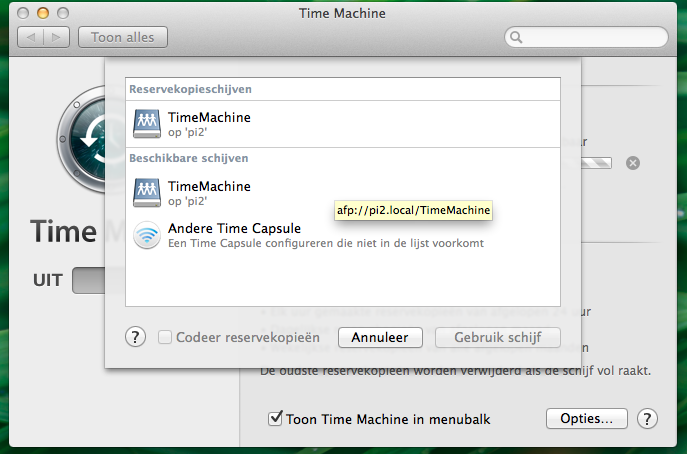
That's it. You can now configure Time Machine on OS X. Search for the folder, it should pop up:
Enjoy your $ 35 Time Capsule. Consider making a donation with (a part of) the money you saved. Or if you like this article and want to support me AND get $10 Digital Ocean credit (2 months free), use this link to order: https://www.digitalocean.com/?refcode=7435ae6b8212
Tags: apple , arch , articles , backup , debian , os-x , raspberry-pi , time-capsule , time-machine